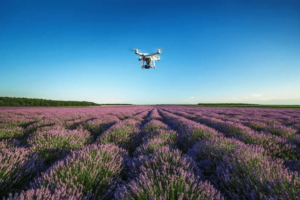
The primary use for two dimensional (2D) mapping is to have an up-to-date aerial image of a large area of land or property development. We can create a single large photograph by composing a mosaic of aerial images through a process called “stitching.” 2D mapping is especially needed in the construction market since the vast majority of Google Earth views will show an empty field where there has actually been extensive dirt work and framing of foundations over the previous few months. Google Earth is one of the most useful applications on the Internet today.
Numerous times I have put it to work finding directions, viewing potential vacation spots, and taking virtual aerial tours of locations all over the world. Though the resolution has increased over the years, there are some locations that are not so clear.
The other downside of Google Earth is that less active areas are not quite up to date. Some aerial images of rural properties can be a year old or more.
Bring on UAVs to solve both of those problems. Construction clients will pay dearly for periodic Google Earth-like, 2D high-resolution images from a 90-degree overhead angle in a single large JPG file. With a high-quality camera integrated into the Phantom on a rotating gimbal, this is possible with the right technique and software.
Attain Property Line Info and Last Google Earth View
First, you need to know your target mapping area and its boundaries. I use our county’s tax appraisal website and obtain an image showing the property line in bright green so I can plan my flights.
Try to use boundary reference points such as existing roads, tree lines, and waterways like creeks and bayous to help you in the field. Set the waypoints under the Ground Station utility in the DJI Vision app on your iPad. If the target property to be mapped is smaller than ten acres, it should be able to be flown and photographed in a single-battery flight as long as the total distance flew is less than two miles. Any larger area will take multiple sorties and will require you to lay out and plan multiple sections of flight grids and how they will overlap sufficiently.
Mapping Flight Grid
Let’s start with a single flight grid mapping a ten-acre property with existing static features. This means the image on your Ground Station background matches the current view from the air at the time of your flight after you have obtained the perimeter from either the client or your tax appraisal website, set waypoints in a grid configuration at an elevation of 200 feet, with each stitch leg of flight 200 feet apart.
Flight Grid This is called the 200×200 mapping grid which covers most areas smaller than 100 acres quite well. Larger 2D mapping projects will require a higher elevation, but since our FAA COA limits us to only 200 feet, we will utilize the 200×200 “rule of thumb” for aerial mapping. When future COAs allow us higher altitudes, we can bump up to the 400×300 grid, which is 400-feet AGL with 300 feet of leg (flight segment) separation to help us cover more ground. Keep in mind, the higher we fly, the lower the resolution will be after the final image is produced.
Static Environment Is Critical
The secret to successful aerial mapping has a static environment to photograph and a stable platform to take those photos. We use software to gather these images, match them based on the overlays, and create one large contiguous picture that can be several hundred megapixels in size. For the images to be taken properly so the stitching process will work, we need 20–40 percent overlap, and for nothing to change on the ground while we are filming.
This means no vehicle or large animal movement during the aerial image capturing process. We also have to have minimal to no wind affecting our flight. I only perform 2D mapping flights with less than 5mph winds and insist on no activity on the ground. The last thing you want is to finish the flight, download the captured images at home, and find out not enough images will stitch due to a truck moving throughout. Just as bad can be wind pushing your UAV into a crabbed angle of flight (where you’re fighting wind), skewing your camera view, which can also have a negative effect on the stitching software’s ability to match up the images.
Simply put, if you are planning a 2D mapping flight, make sure you do it on a dead-wind day with no activity planned for that area. I had had to shoot some mapping projects on a Sunday when business was closed to have a static environment and was praying for no wind during that same time frame. Sometimes the low-wind opportunity and the lack of activity for 2D mapping is difficult to schedule, but that is why we can charge more for that service.
Set Camera Mapping Mode
Once your grid is laid out, hit the DONE button and verify all your waypoints are at a consistent elevation of 200 feet (plus or minus 5 feet), and your speed is set to FAST. Then toggle back to the main camera screen to make some changes there before your flight. First set the camera pitch to straight down at a 90-degree angle to the flight.
Then, go into the options and set the camera snapshot to timed, with three seconds between shots. Exit out of the camera mode and swipe back to the Ground Station and hit GO to begin the mapping flight. Just before it arrives at the first waypoint, which is the start of the grid, remember to go back to the camera screen and start the photo capture by hitting the camera button. You should start seeing the shutter take pictures every three seconds, with the screen going dark every few seconds.
Watch the UAV physically, monitor the battery level, and view the progress of the flight to the waypoints on your iPad all at the same time. When the drone arrives at the final waypoint and turns to come home, stop the picture capture from making it easier to process later. Just before the bird arrives home, take a screen capture of the grid-flight pattern on the Ground Station display for reference to create the next grid flight, if you have to perform additional sorties to capture large areas. If an additional grid is needed, create it based on a 20 percent overlap with the first grid previously flown. Swap in a fresh battery, and restart the process.
2D Map Stitching
Upon returning to your home office, download the raw-mapping images to your workstation and Defish them if necessary, to remove the wide-angle fisheye effect with the DeFishr program we discussed earlier. Then, download and install the free Microsoft program Image Composition Editor (ICE) to combine the numerous straight-down photos your UAV captured.
Hopefully, you captured the images at the straight up and down camera pitch, with no wind affecting the flight path, with no activity on the ground, with the proper overlap, at the right UAV velocity, and a consistent altitude. If everything went just as you planned it and your Defishing process is complete, you should be able to drag and drop the images into ICE and watch it stitch together a single, large, flawless image that puts Google Earth to shame.
KLONK Software to Measure 2D Entities
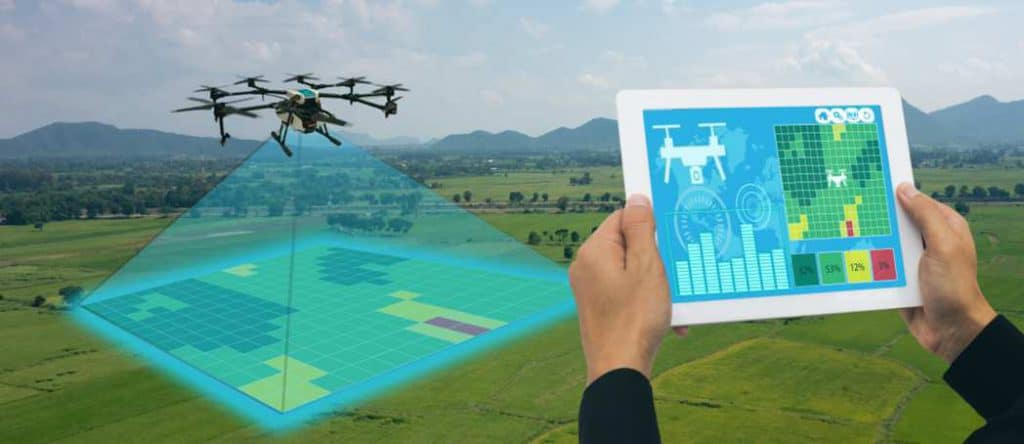
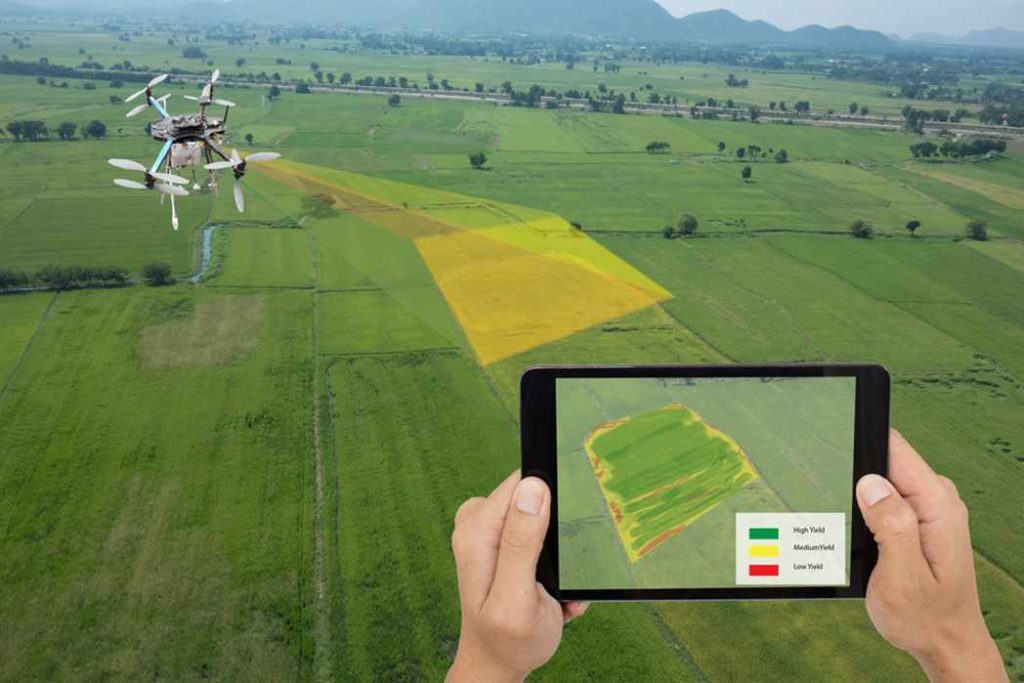
Once you have a high-resolution 2D mapped image, it may be time to analyze it by taking measurements of certain features. An excellent, affordable application to perform this duty is from KLONK and is called the Image Measurement tool (www.ImageMeasurement.com). The professional version of this Windows-based program costs $35 a month and can be a very valuable tool for you and your client if recurring 2D mapping flights are in order.
You can import your high-resolution mapped image into the Image Measurement application. After setting the calibration using an object of a known size, you can then take measurements of length, circumference, radius, and area of things on the ground. This can be quite helpful to clients who have to quantify amounts on the ground or even take inventory on their property.
2D Mapping Image Measurement 2D mapping with UAVs can be difficult due to UAV configuration and flight condition restrictions along with the advanced software applications necessary. However, once we get the processes down, it can be a great asset and a profitable skill set to offer.